Additive versus Static Gradients
This may be a simple tutorial, but it introduces you to two fundamental concepts: that of additive versus static gradients, and the idea of masking to display only part of an underlying image. These two principles are so useful that there is rarely an image that does not use some part of this tutorial.
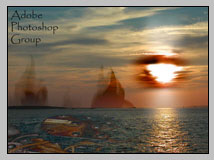
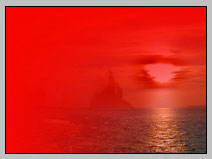
First, let's take a simple image with two layers: a solid color on one layer on the bottom, and an image on a separate layer on top.
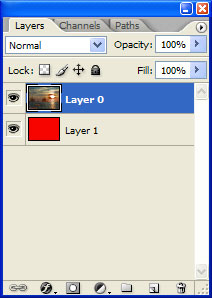
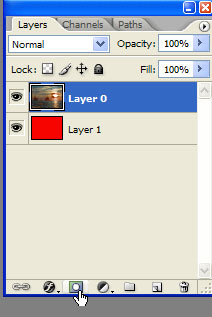
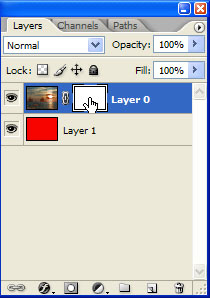
Now let's create a layer mask to the top layer. With the top layer selected (highlighted in blue), click on the "Create new layer mask" icon on the bottom of the layers palette. This creates a layer mask, which acts as a shield between the top and bottom layer. Wherever the shield is white the layer below is blocked. Wherever it is black the layer below is revealed.
A lot of people find the concept of masking hard to grasp at first, but it's really quite simple. Think of yourself holding three sheets on top of each other. The top sheet has your image, the bottom sheet has your color, and the middle sheet is made of some superfunky material that can go from Transparent to Opaque using 0-255 levels of transparency. The closer to white the middle sheet gets, the more transparent the color underneath becomes. The closer the middle sheet gets to black, the more opaque the sheet becomes and the less you can see the color underneath.
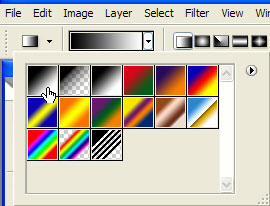
Getting back to our image, let's select the gradient tool from the toolbar, and click on the drop-down gradient selection arrow on the top of the options toolbar (highlighted by the red circle in the image below). The preinstalled gradients are displayed. From this list, select the second gradient (foreground to transparent).
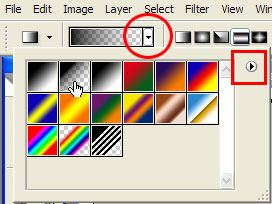
Tip: if you don't see this gradient, click on the drop-down arrow located on the top-right corner of the gradient editor (highlighted by the red square in the image above) and select "Reset Gradients" to bring your gradients back to their defaults.
Next, select the linear gradient if you haven't already.
Holding your shift key down, drag the gradient line from top to bottom. You end up with half the color covering the image from top to bottom.
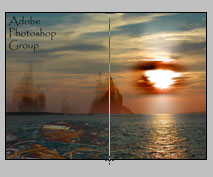
If we look at the layer mask only (Alt+Click on the layer mask), you'll see that the gradient does not overwrite the previous top to bottom gradient, but instead adds to it. Hence, it is an additive process.
The reason why this works is because the gradient we are using contains transparency in it. It goes foreground to transparent.
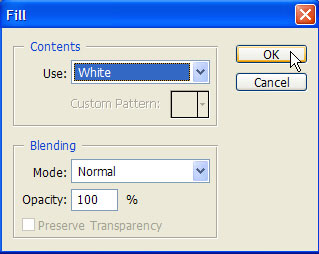
So let's step back for a minute and see what happens when there is no transparency in the gradient. To quickly step back, go to Edit -> Fill and fill the layer mask with solid white. This removes all the gradients from the layer mask and brings it back to it's original all-white state, which reveals the entire image once again. Once that's done, Alt+Click on the layer mask in order to reveal the entire image once again.
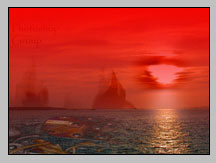
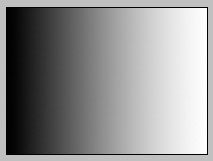
This time, select the Foreground to Background gradient (this should be the first gradient in the list). This gradient contains absolutely no transparency, but instead goes from Black to White (provided of course that your foreground/background colors go from solid black to solid white).
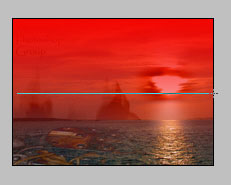
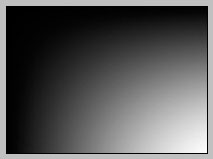
Now let's do the same thing, by adding a gradient from top to bottom, and from left to right consecutively.
Wait a minute. What the heck happened there? Why does this gradient look different. Simple: because it was overwritten by the previous gradient. Since there is no transparency, the gradient will completely change with each subsequent gradient. In this respect, the gradient is what I would call "static."
I hope that gives you a good introduction to using transparency in your gradients and masking in general. So go out there armed with this knowledge and create some sophisticated composites. Good luck!