Wholesale Color Swapping
There are many ways you can manipulate and change the color of an image. Most notably through the Hue/Saturation dialog or the Channel Mixer. In this tutorial I’ll teach you how to trade the entire set of colors from one image to another wholesale. This method is similar to Gradient Mapping your image, however, it provides you with the ability to interchange colors between images, and has the added benefit of being able to use more colors in your mapping. Not to mention it’s a very simple process and can produce some interesting color effects. In fact it only takes one or two steps more than applying a Gradient Map adjustment layer. I sometimes use this technique just to view what kind of crazy results I can come up with.
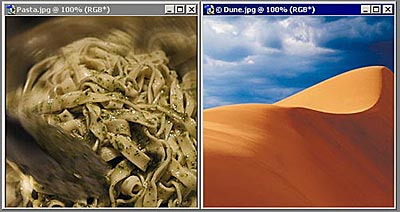
For this tutorial you will need two images. One image where you will pull the color from (your source) and the other image you want to place the new colors into (your destination). Ideally, both images should have good tone and enough different colors that there will be a noticeable change when you switch colors from one image into another.
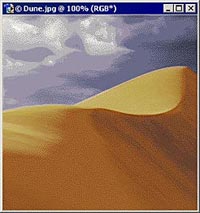
For this exercise I chose the following two images: The first is an image of Pasta, and the second is an image of a Dune. Both images can be found under your Photoshop/Samples folder:
Step 1
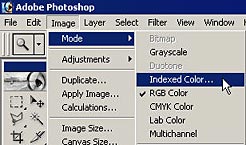
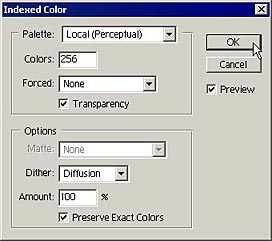
For this tutorial I want to replace the Dune image with the colors from the Pasta image. So the first step is to select the Pasta image, and go into Image -> Mode -> Indexed Color. Enter the settings you see below. Basically, I am going to elect to have 256 colors (the maximum allowable in Indexed Mode), make sure no colors are forced, and choose to have no Dither. The type of Palette you select is not all that important, so I would leave this at the default "Local" ("Perceptual") palette, as this is the closest to palette to what the human eye can see.

Step 2
When you have finished selecting these options, click OK, and your image is now transferred to Indexed Color Mode. As a side note: this is the same mode for a GIF image.
Step 3
Now that we’ve pulled out the colors from the Pasta image, we need to save them. To do that, go back into Image -> Mode and select Color Table.

Step 4
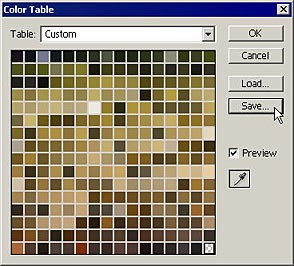
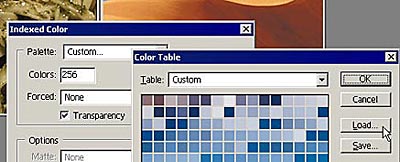
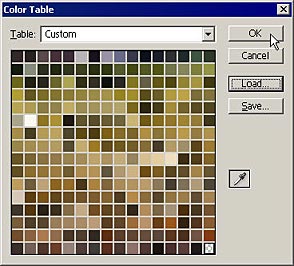
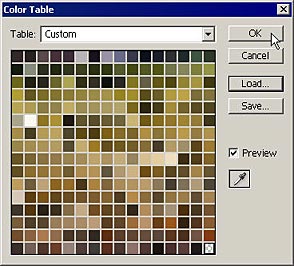
This opens up the Color Table for the Pasta image. Click the Save button.
Step 5
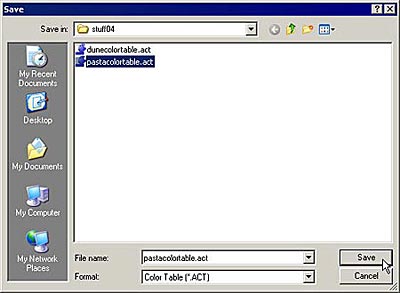
Save the Color Table somewhere on your hard drive. You will need this table in order to transfer the colors between images.
Now that we have the Color Table saved, let’s go back into the Dune image. At this point you don’t need to keep the Pasta image open, or even save the image in Indexed Mode. You are done with it.
Step 6
With the Dune image selected, go back into Image -> Mode -> Indexed Color.
Step 7
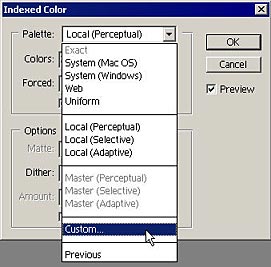
This time, click on the "Palette" drop-down arrow and select Custom.
Step 8
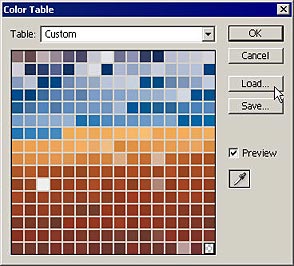
In the Color Table dialog, click the Load button.
Step 9
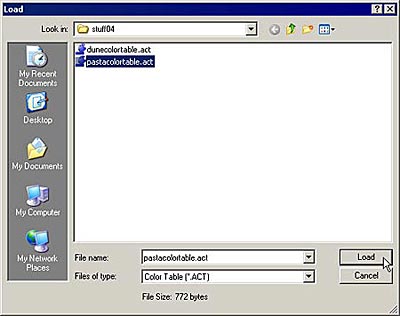
Navigate to your saved Color Table from the Pasta image, select it, and click the Load button.
Step 10
Click the OK button in the Color Table dialog to confirm this is the color table you want to use within the Dune image.
One of the important options at this point is the Dithering. When you swap color tables in this manner, it is inevitable that there will be a loss of detail and color to some extent. This occurs in part because you can only hold 256 colors in any indexed mode image. It is also caused by switching colors in this manner from one image to another. In order to minimize the color and detail loss, you have the option to Dither the colors so there is more of a gradual transition between the colors. Dithering combines colors together so that you don’t see any banding, and it minimizes the perception that there is a loss of color detail. For the most part you want to choose Diffusion as your dithering option. But I’ll show the other options at the end of this tutorial. For now, select Diffusion and click OK in the Indexed Color dialog.

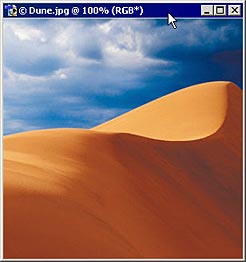
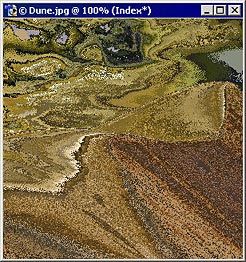
Here is the result of our color swap. Not a drastic change, but a change nonetheless.
We could stop right here and call it a day, however, there is a little known thing that happens when you first change your destination image to Indexed Color Mode and then apply your color swap from the Color Table dialog. Up to this point you haven’t really swapped colors at all. What you did is preserved the colors of the original image and married them with the colors of the source image (Pasta image). Now we are truly going to switch tables in the image.
Step 1
For this process first, transfer your Dune image into an Indexed Color Mode image. I used the settings below:
Step 2
Next, go into Image -> Mode -> Color Table and from this dialog click on the Load button. If you remember, the last time we didn’t bother to change the Dune image to an Indexed Color Mode image first, we instead went directly to the Indexed Color dialog and affected the color there. This time, the only thing different is the fact that we are already in an Indexed Mode for our image, and so we need to swap the Color Table directly in the Color Table dialog below:
Step 3
Open the Pasta Color Table once again, and then click OK in the Color Table dialog.
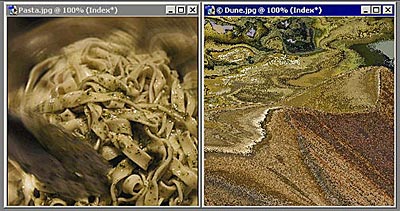
WOW! Now there is a true color change. Here we haven’t preserved any of the original color from the Dune image. We have truly swapped color tables between the two.
Looking at the images side by side, you can see more clearly how the Pasta image colors have been transferred to the Dune image. Unfortunately you have no control over how these colors are mapped, but if you take this route it’s not really all that important. The key with this process is to produce a very drastic and artistic result. It’s amazing what kinds of effects you can come up with by using this method. And it’s a very quick way to create a unique result.
As I said to you previously, the type of Dither you apply to the image affects the final outcome. Below, you can see the various Dither options at work:
 No Dither |
Dither: Diffusion |
 Dither: Pattern |
 Dither: Noise |
I hope you enjoyed this Color Swapping tutorial. Many people aren’t aware this is possible, but it turns out that this is a simple method to implement some wild color changes to your image. Pretty soon I’m sure you will have a full library of Color Tables that you can apply to your images.