Diffusion / Soft Focus
Sometimes you want to give the photo a soft touch. This is something that is commonly found in Portraiture, and it has some very practical applications. While it warms up your photo, it will also remove any lines or blemishes from your subject's face. This is a very easy technique that can be applied to any image in order to give it a softer look.
If you are using photographic filters, this would have the same effect as applying a diffusion filter. And the wonderful thing is that you can vary the degree of diffusion you apply to the image (as a percentage), while maintaining the integrity of the digital image. In other words, there is no loss of pixel data.
Here are the steps to apply a diffusion or soft focus to the image:

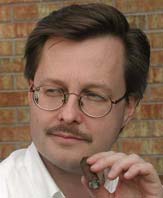
Begin with the image you want to filter.
Step 1
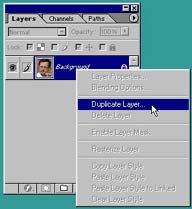
First, from within the Layers palette, and with your mouse on top of the background layer, right-click and select Duplicate Layer.
Step 2
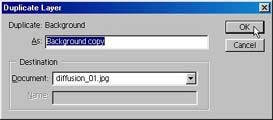
This duplicates the layer. A dialog box opens asking if you want to provide a name for the new layer. Since we will only be working with two layers, it's not necessary to give it another name. However, it is good practice as your layers become numerous, and will often help to prevent confusion. When you have provided a new name, click the OK button (shown below).
Step 3
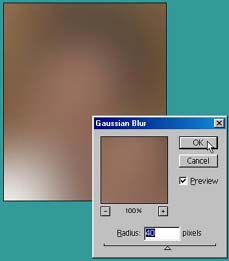
Next, go into Filter - Blur - Gaussian Blur and select a Radius between 30-50. The more you blur the image here, the softer it will become. I find a blur between 30 and 50 works best. Less than that and there is not enough softness, and more than that would just be overkill. But experiment with what suits you best. When you have set the radius, click OK.
Step 4
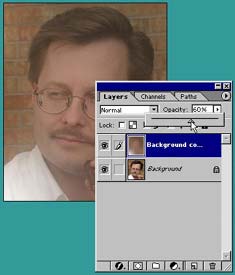
Since you applied the blur only to the duplicate layer, set the Opacity for the layer to the desired degree of diffusion, until it suits your taste. The reason why there is no degradation of the pixel data is because your layer is preserved on the background (original) layer. It is completely non-destructive. This is useful in a lot of other areas and image work. And it is usually a good idea to duplicate the original layer first before doing any heavy editing. Not only are you working in a non-destructive manner, but you can always go back to your original image by deleting the other layers and keeping your background layer intact.
Here is the original next to some different variations. For this particular photo I went with an Opacity setting of 50%. That seemed to work best.
Original |
 20% Opacity |
 40% Opacity |
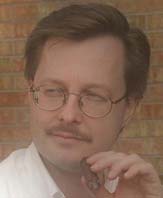 60% Opacity |
 70% Opacity |
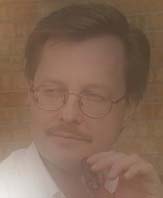 80% Opacity |