Creating your First Pattern
Creating Patterns are useful for all kinds of reasons; For producing Web backgrounds to providing a variety of backdrops in your photos or as a piece to add a little more punch to a collage. They can range from very simple to very complex in design, and once again, with Photoshop the sky is the limit. I'm going to focus here on how to make a very simple checkerboard pattern, so that you get the idea of how it can be achieved. This is a tutorial for those who have had little experience with patterns or who are not very knowledgable with Photoshop and how Patterns are executed. All in all it will get your feet wet.
Step 1
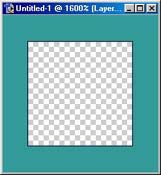
Start out by creating a brand new file by going into File - New. Set both the Width and Height to 10 pixels, and the Contents to Transparent. Then click OK.

The canvas will open and look incredibly small (below).

Step 2
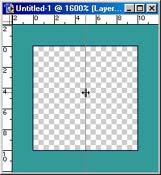
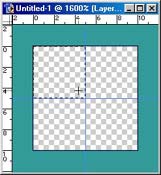
Now use the Zoom tool to zoom into the image as far as you can. Hover the Zoom tool over your image and keep left clicking until the magnifying glass becomes completely white. You should end up with a size approximate to what you see at right.
Step 3
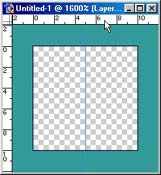
Next, go into View - Rulers in order to put a ruler along the length and height of the image. At such a small pixel size, this is not really a necessary step, but is good practice when you work on patterns of a larger size, and so it's good to get into the habit of using rulers.
Step 4
Next, we will put in two guides along the horizontal and vertical axis directly in the middle of the image. Again, this is not necessary, but is good practice on larger files. To place a vertical guide, left-click on the side ruler and drag out over the image. When you get to the center at 5 pixels across, let go of the mouse and a blue line will drop onto your image.

Step 5
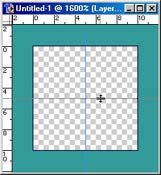
Do the same for the horizontal axis by dragging from the top ruler over your image. If you ever want to clear the guides, simply go into View - Clear Guides.
Step 6
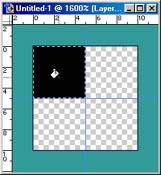
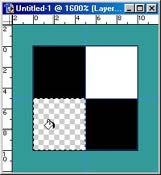
Once the guides are in place use the Rectangular Marquee tool to create a square selection that encompasses to top left quadrant of your grid. Since the canvas is so small, you will see the pixels snap as you drag the marquee over the quadrant. It's for this reason that you could easily make this design without rulers and without guides. But doing things this way ensures that you can make more complex designs later.
Step 7
Once this is done, select the Paint Bucket tool, and with your Foreground color set to Black, click on the square selection you just made with the Marquee tool.
Step 8
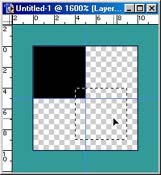
Next, click on the Marquee tool again, and move the selection by dragging the square to the bottom left quadrant. Click on the Paint Bucket tool once again, and fill the new selection with Black as you did for the previous square.
As an alternative, you could duplicate the quadrant with the Move tool. Just select the Move tool and Alt+Drag the selection from one square to the other. Be careful if you use your keyboard to do this though, because if you hold down the Ctrl key and use the arrow to create your duplicate, each subsequent arrow move will create a new copy. Instead, hold down the Ctrl key, and tap the arrow key once, then let go of Ctrl and you are free to move the selection you just created without holding down the Ctrl key anymore. It can be tricky, but the more practice you have, the easier it will become. I generally use the visual approach more than the keyboard shortcuts, however, I must say that keyboard shortcuts will always beat out the mouse for speed and efficiency.
Step 9
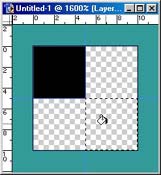
Now set your foreground to white and repeat the above process to the remaining two squares, making them white instead of transparent.
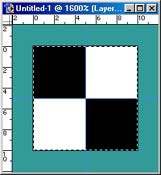
Step 10
The checkerboard is complete. All that remains now is to save it as a pattern in photoshop. To do this, go to Select - All. This will ensure the entire image is used for the pattern. You could select only part of the image for a pattern as well. Whatever you have selected is going to become your new pattern.
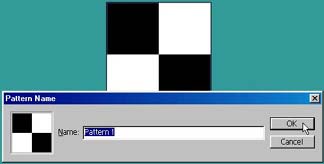
Step 11
When you have the design selected, go into Edit - Define Pattern. Provide your pattern with a new name, and click on OK.
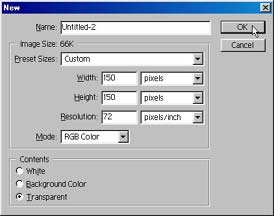
Now you have a pattern, but what good is a pattern if there is nothing to paste the pattern into. So, create a new file with the following dimensions: Width: 150 and Height: 150 with the same Transparent setting under Contents. Be very careful to create a file that has the same multiple value of the pattern you created. Otherwise the pattern will cut off at the edges. More about this in a minute. For now let's move on and view our pattern.
Step 1
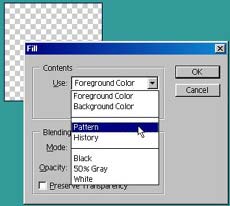
Apply our newly created checkerboard onto the empty canvas. To do this, go into Edit - Fill. In the Use field, select Pattern.
Step 2
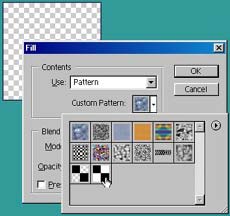
The Custom Pattern dropdown preview will become enabled. Click on the dropdown arrow and find your pattern. Click on it to select it. Then click OK.
You now have a working pattern:

Remember how I said you have to use relative dimensions when applying your pattern? The reason is that if you were to apply a pattern to a canvas that was a non-relative size, you would end up with the pattern being cut off at the very edge of the canvas. Furthermore, if our pattern were not symmetrical, applying it to a canvas that is larger than the pattern itself would produce visible seams on any side that is asymmetrical. What we have created above is called a Seamless Pattern, because there will not be any visible shift from edge to edge when the pattern is laid down. By far, these are the best kinds of patterns you can create, and more difficult. Though there are times when producing a visible edge is a wanted effect.
So how do you get Patterns to be symmetrical when they become more complex? Photoshop has an Offset filter that can be used to turn any image into a pattern in just a few steps. There is also another method which uses Masks, and there is also a way to generate random designs that can fake a seamless look. I will be writing more tutorials on these methods in the coming weeks. Also, I'll be working more on how to produce variations with this elusively simple pattern, to produce more engaging pattern effects. So stay tuned.