Creating Oxidized Metal
In this tutorial I'm going to teach you one out of a thousand different ways to create a metal look. In this case I'll focus on oxidized metal: the kind of metal that you would see on a statue that is turning moss green and dark rust from the ravages of time. So let's get started:
Step 1
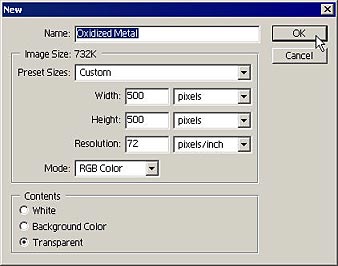
First, create a new document with the following settings. The size (width and height) can be variable, but make sure you keep the resolution at 72 in order for all the filter effects and transformations to work properly.
Step 2
Reset your Foreground/Background Swatches as shown below:


Step 3
Now follow along with the rest of the instructions, exactly as they are shown below:
Edit -> FillUse = Black; Mode = Normal; Opacity = 100%
Filter -> Noise -> Add Noise
Amount = 90%; Distribution = Uniform; Monochromatic = Checked
Filter -> Texture -> Grain
Intensity = 100%; Contrast = 100%; Grain Type = Horizontal
Edit -> Transform -> Rotate 90 degrees CW
Layer -> New -> Layer
Edit -> Fill
Use = Black; Mode = Normal; Opacity = 100%
Filter -> Noise -> Add Noise
Amount = 150%; Distribution = Uniform; Monochromatic = Checked
Filter -> Texture -> Grain
Intensity = 100%; Contrast = 100%; Grain Type = Horizontal
Filter -> Stylize -> Wind
Method = Stagger; Direction = From the Right
Edit -> Transform -> Rotate 180 degrees
Filter -> Stylize -> Wind
Method = Stagger; Direction = From the Right
Edit -> Transform -> Rotate 90 degrees CW
Select Layer 1
Filter -> Stylize -> Wind
Method = Stagger; Direction = From the Right
Edit -> Transform -> Rotate 180 degrees
Filter -> Stylize -> Wind
Method = Stagger; Direction = From the Right
Select Layer 2
Set the Blend Mode of the Layer to Screen
Layer -> Merge Down
Filter -> Pixelate -> Fragment
Filter -> Distort -> Glass
Distortion = 4; Smoothness = 8; Texture = Tiny Lens; Scaling = 200%
Select -> Color Range
Select = Midtones
Layer -> New -> Layer Via Cut
Layer -> Layer Style -> Bevel and Emboss
Depth = 151; Size = 1 (leave all the other settings as they are)
Layer -> Layer Style -> Create Layers
Hide Layer 1
Layer -> Merge Visible
Show Layer 1
(at this point be sure Layer 2 is still selected)
Edit -> Adjustments -> Hue/Saturation
Hue = 40; Saturation = 30; Lightness = 0
Select Layer 1
Edit -> Adjustments -> Hue/Saturation
Hue = 144; Saturation = 42; Lightness = 0
Layer -> Merge Visible
Layer -> New -> Layer
Move the Current Layer (Layer 2) to the bottom of the Layer Stack (to Layer 0)
Edit -> Fill
Use = 50% Gray; Mode = Normal; Opacity = 100%
Layer -> Merge Visible
And here is the finished result:
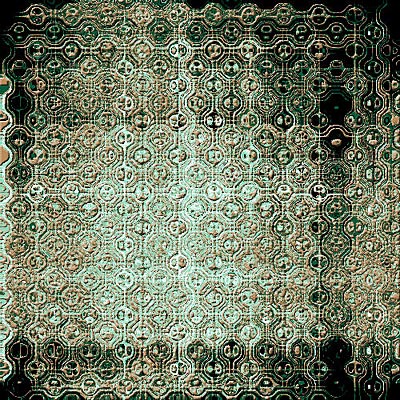
I hope you enjoyed that little excursion into the Photoshop filter and color toolbox. Until next time I hope you learned something new, and don't forget to have fun when using Photoshop!