Unfinished Artwork
Create an unfinished masterpiece with an underpainting layer which itself becomes a masterpiece in its own right.
Here is a great way to present a creative twist on an old idea. Most times, you want your photograph to give off a polished, finished look that sparkles with originality. And no doubt you've spent many hours reading up on how to turn your photo into a dramatic painting that everyone gasps at and says "WOW! That's incredible." But how about if you turn the artwork upside down. What if the image you present to the public is unfinished. In this tutorial I'll show you how to create an unfinished piece of art using the Find Edges filter, a few layers, and some layer masking. Along the way you'll learn how to create some brush effects too.
So let's get started.
Step 1
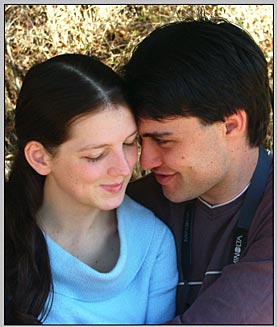
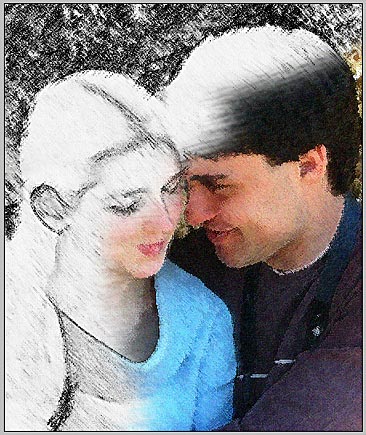
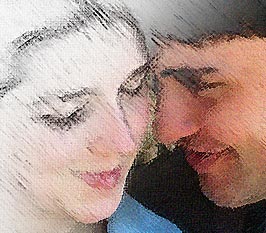
First, select an image you want to turn into your unfinished artwork. This image is 800 x 700 pixels. I'll use that as the basis for our painting.
Step 2
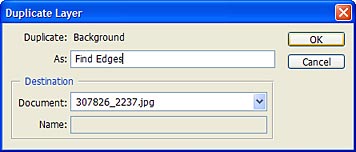
Duplicate the layer by right-clicking on the background layer, and selecting Duplicate layer.

Step 3
In the dialog box that opens, name the layer "Find Edges" and click OK.
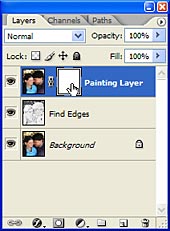
Step 4
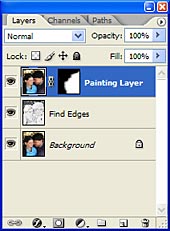
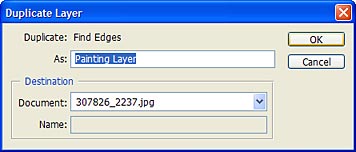
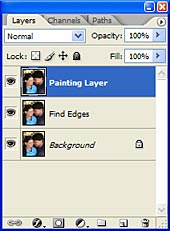
Duplicate the layer again, and rename the layer "Painting Layer." Your layer stack should look like the image below.
Step 5
Next, add a few filter effects to the painting layer. Here, I added the following sequence of layers using the Filter Gallery in CS2 (under Filter -> Filter Gallery)
- Top Filter Layer: Rough Pastels (1 / 4 / Canvas / 100% / 4 / Top Left)
- 2nd Filter Layer: Grain (27 / 50 / Soft)
- 3rd Filter Layer: Angled Strokes (50 / 17 / 2)
- Bottom Filter Layer: Dry Brush (0 / 5 / 2)
The filters applied are not necessarily important. If you have a custom recipe for a nice painted effect, or even if your image is a painting, you can use this for your Painting Layer without applying any filters at all. The idea is to create the illusion of a painting on the top layer.
When finished, add a layer mask to the painting layer by clicking on the "Add layer mask" button at the bottom of the layers palette. A new layer mask becomes available.
Step 6
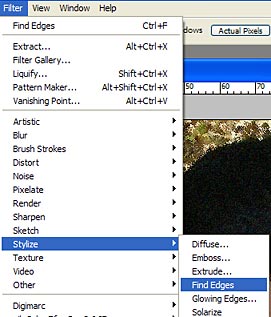
Next, go back to the "Find Edges" layer by clicking on the layer (to select it). Then apply the Find Edges filter (Filter -> Stylize -> Find Edges).
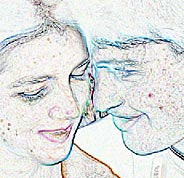
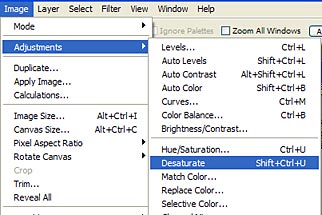
Step 7
Desaturate the "Find Edges" layer (Image -> Adjustments -> Desaturate).
Step 8
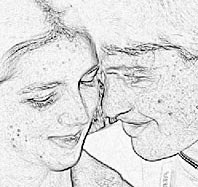
Apply a second group of filters that closely mimic the original filters for authenticity. Using the Filter Gallery once again, I applied the following filters to the "Find Edges" layer:
- Top Filter Layer: Accented Edges (1 / 23 / 1)
- Middle Filter Layer: Rough Pastels (9 / 7 / Canvas / 100% / 5 / Top Left)
- Bottom Filter Layer: Angled Strokes (50 / 11 / 3)
As with the previous Filter Gallery settings, you don't have to follow my exact recipe. Experiment with your own settings, but try to keep the image somewhat close to the painted layer above. The goal is to create a line drawing that resembles your painting.
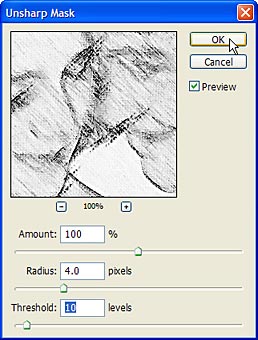
After you're finished applying these filters, use the Unsharp Mask to accentuate the line drawing. The following image shows my settings. Be sure to play with the Threshold setting in the dialog, using a setting between 5 and 20 or so. This can produce some interesting effects.
Step 9
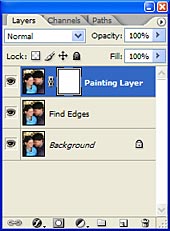
Next, click on the Painting Layer's mask in the layers palette, as shown below.
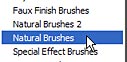
Step 10
Click on the Brush tool from the toolbox. Then go into the small Brushes palette on the options bar, and click on the top-right arrow to load the "Natural Brushes" set.

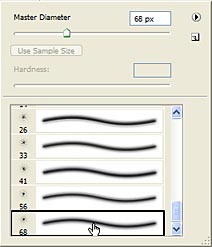
Step 11
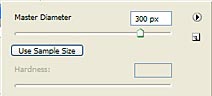
Select the last brush in this set. This is the Spray 68 pixels brush. Then ramp up the Master Diameter setting to 300 px.
Step 12
Make sure your foreground / background colors are reset to Black / White. To quickly do this, press "D" on your keyboard.

Step 13
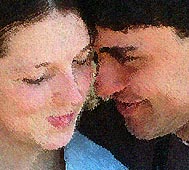
Brush along the image in even strokes going from the left side of the image into about the middle of the image. Vary the length of your strokes and make it look a little sloppy. You'll end up painting away the main "Painting Layer" and showing through to the underlying "Find Edges" layer that contains your line drawing. If you make any mistakes, switch the foreground / background colors using the "X" key and paint on your layer mask using white. If you really make a mistake and want to start over, simply press Ctrl + Backspace to return the mask to a clean (white) slate.
Here is the final image. You can also experiment by painting on the mask using any number of brushes, or paint anywhere on the mask to show or hide through to the unfinished painting below.
Step 14
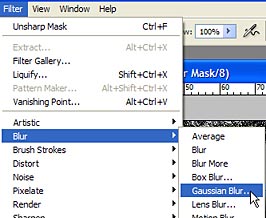
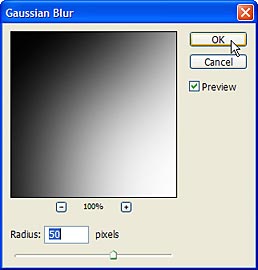
If you prefer having soft edges to your image, instead of brush edges, you can apply a Gaussian Blur to the layer mask (Filter -> Blur -> Gaussian Blur). Select a Blur Radius of approximaely 50.
Step 15
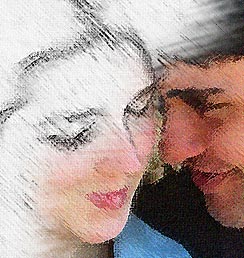
The following shows the image with brushed edges (top) and soft edges (bottom):
Step 16
And here is the final Layers palette. Using only 2 additional layers, you can create a very interesting unfinished piece of art. Also try experimenting with various Blending Modes for the top layer. Pin Light, Hard Light, and Darken work well in this circumstance.