Fixing Underexposed Images
We've all done it before. We set up the lovely picture of the family, snap the shutter, and presto! There's that lovely picture of the big black blob in front of the window. It happens a lot, and more often than not it's due to excessive background lighting, which is never a good thing.
The majority of the time it occurs when your subject is in front of a window. Since the window is the main source of light, and it's a sunny day, the camera overexposes the entire image, and this results in an underexposure of your darker subject. But this is not the only culprit. Sometimes you can't help the shot. You could be set up in a cramped environment, you could be trying to catch your uncooperative or skitish pet so don't want to move them, or you could be taking candid pictures of the driver in her car.
And that's what happened to me. I was taking pictures of my subject in the car on a sunny day, and I ended up underexposing the shot. Well help is not far away. Here is one technique you could use to improve the image and bring back the lost detail in your subject.
Before I start, let me first say that Photoshop is incredible when it comes to correcting your shots, but it is not magical. It can't make all the mistakes miraculously go away, but it can do a lot to help you out.
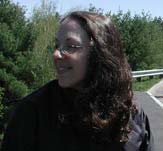
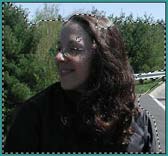
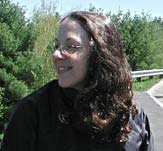
This is the image we are going to correct. As you can see it is severely underexposed (too dark).
Another thing to keep in mind is a simple rule of thumb. It's usually better to have an image that is underexposed, rather than a white overexposed image. The reason is that there is more detail embedded in the dark image. I don't know the precise mathematics of it all, but I can tell you that it is always better to err on the side of "too dark" than "too light". For this reason I usually bracket my photos so that they are slightly underexposed. It makes for easier manipulation later.
Here are the steps you can perform to improve your photo:
Step 1
First, Duplicate the image. To do this, go into Image - Duplicate. In the dialog box that opens, select a new name, so that you don't get the two images confused. When finished, click the OK button.
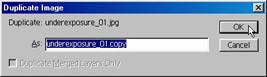
This duplicates the image in a new window.

Step 2
Now let's turn the copied image into a Grayscale (black & white) photo. To do this, go into Image - Mode - Grayscale. A dialog box opens asking you if you want to discard the color information. Select OK in the dialog box. If you don't want to be reminded that you are discarding the color information each time you switch modes, check the Don't show again box.
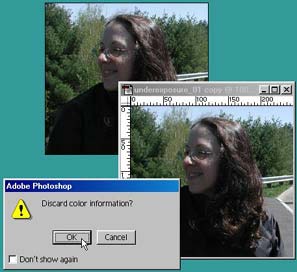
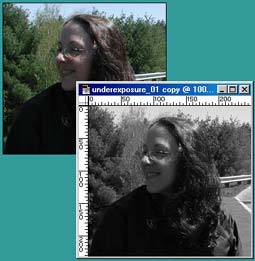
The image is turned into a Grayscale photograph.
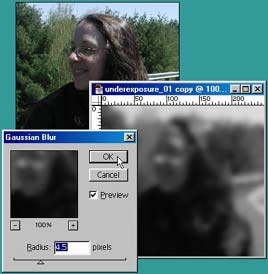
Step 3
Once the image is Grayscale, go into Filter - Blur - Gaussian Blur and select a Radius between 4-6. Click OK.
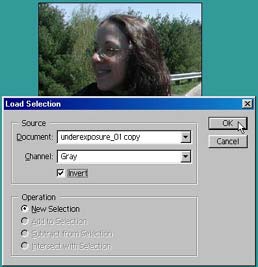
Step 4
Now that we have transformed the copy somewhat, go back to the original image file, and load the selection of the gray channel from the copied image. To do this go into Select - Load Selection. In the Document field, the gray channel should automatically be input. The only thing you should need to do is check the Invert box. Then click OK to close the dialog box.
The selection will be placed over the original image. Essentially, you have just transferred a selection from one image to another (from one file to another). This is good to keep in mind if you want to exchange selections between documents. You can also save and then load selections and give them unique names. This allows for a lot of flexibility between files and images.
Step 5
For the next step, We are going to dodge out the gray areas in the selection by using the Fill command. Go to Edit - Fill. In the dialog that opens, use the following settings: Use=50% Gray and Mode=Color Dodge. Keep the Opacity level at 100%. You can always increase/decrease the Fill later, if you wish. The Preserve Transparency checkbox doesn't matter. As a sidenote, though, with this box checked, any transparent areas of your image will not be filled or touched.
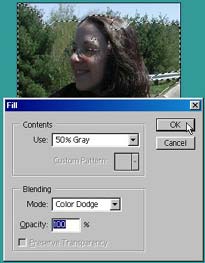
Step 6
Click OK and voila! The image has a better exposure. The dark underexposed areas have been lightened, while the highlights are preserved. Notice the difference between the Original image and the Final result below.
Original |
 Corrected |