Frame Layer Styles
This is a quick tutorial on how to use my frame layer styles with your own imagery. If you haven't already purchased them, you can Order the Frame Layer Styles here. You get 600 frame styles for $12, which is a pretty good deal. If you don't want to pay for the frames, I posted a few frames in my free section so you can still try them out before you buy. If you've already purchased the frame styles, then this will serve as a simple way you can utilize them.
Keep in mind this is not the only way to use the layer styles, but it should definitely be enough to get you started. I get quite a number of requests for how to use these styles, and most people are pretty surprised at how easy they are to use once I send out instructions.
So without further procrastination, here's one method you can use to apply the frame styles:
Step 1
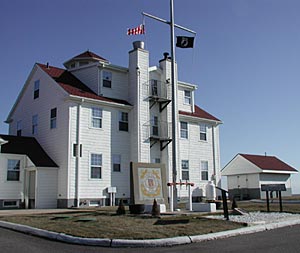
Open the image you would like to frame. Here we have a nice photo from Naragansett, Rhode Island.
Step 2
If your layer is on a background layer, double-click the layer and select OK in the dialog that opens. This turns your layer into a normal layer (ie: it unlocks the layer). Make sure the Image mode is RGB (Image -> Mode -> RGB Color).
Step 3
Go into Image -> Canvas Size and check the "Relative" checkbox, change the units to Pixels and enter a size for your frame (for example, enter 100 pixels for both Width and Height, as I've done in the image below).

Step 4
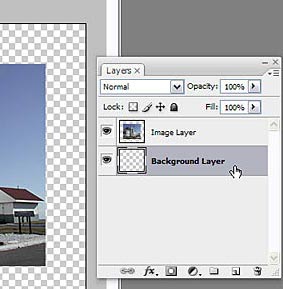
Create a new layer by clicking on the New Layer icon at the bottom of the layers palette. Then move the layer underneath the image layer. This is going to be your background (frame) layer.
Step 5
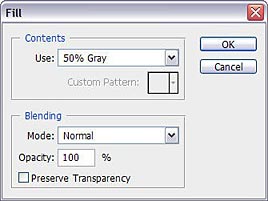
Go into Edit -> Fill and select 50% Gray in the "Use" field. Leave everything else at their defaults as shown below. Then click OK.
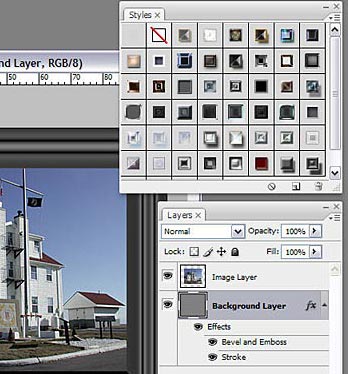
Step 6
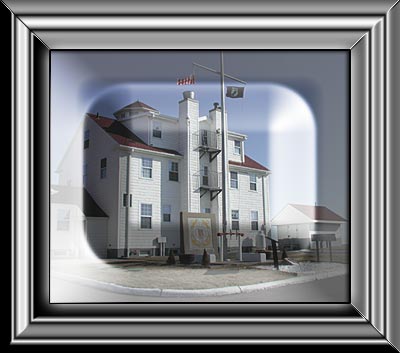
Load up some of my Frame styles in the Styles palette. To do this, click on the drop-down at the top right corner of the palette, select Load Styles, and navigate to where you saved my styles on your hard drive. Click OK and they're instantly loaded. Here I loaded the metal & glass style set. Then click on any of the styles until you find one you like. To undo an applied style, click the square with the red stroke through it. This is a special style (the first one in the list) that removes any stylings from the layer. Your frame is instantly applied to the background layer, and your image is framed. Voila! But read further for some interesting variations.
Step 7 (optional)
One variation you can make is to change the color of the background (frame) layer. Here, I've changed the color from gray to white. Notice the frame becomes lighter. This is one alternative you can try. Try a few different colors to see what you like best.
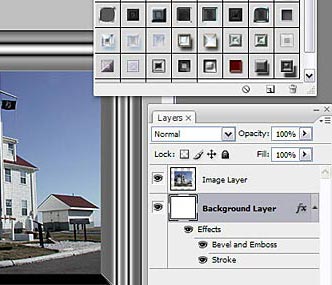
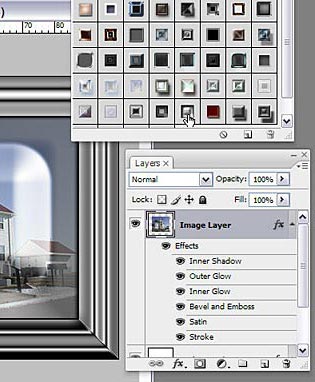
Step 8 (optional)
Another alternative is to frame the image layer. To do this, you can select the original image layer, and try out the various styles by clicking any of the styles in the Styles palette. Try a combination by framing both layers, as shown here. Note that if you apply a style to the image layer, you're probably going to cover some of the image itself. But I'm throwing it out there as an option for you.
Step 9, and beyond
This tutorial just touches on some of the ways you can use my Frame Styles. Use your imagination and you can go beyond simple styles. If you want to adjust any of the styles, feel free to double-click on one of the effect elements in the layers palette, open up the style dialog, and change any settings to suit your needs. Use my frame styles as a starting point to come up with your own. Get all out creative with them. That's why I made them for you. To jump in and apply quick effects, or to carve out your own. Enjoy!